


These photos show some of the tools and steps in making a self longbow. A "self" bow is a bow made from one piece of wood, as opposed to a laminated bow. It is the most primitive type of bow, but can be very accurate and perform well when made of a desirable wood such as Osage Orange. Osage is a very dense, hard wood that is in great demand by bowyers.
If you are lucky enough to have access to Osage Orange trees, you can cut and cure a bow blank. This is very time consuming, and if you are as impatient as I, you would be better to purchase a blank.
A blank will be a roughed out stave and will require a lot of work to finish, but will be a project well worth undertaking. The basic tools required will be a band saw, rasp, round file, tillering stick, form for imparting reflex, sandpaper, leather for grip and lots of elbow grease.
The band saw will be used to taper the width of the limbs to the proper dimensions. It would be wise to use a template in order to make them symmetrical. If the blank is thick enough, you could cut out an arrow shelf to make it more of a center-shot bow, but many primitive archers "shoot off the fist" without a rest. You can use a piece of Osage or leather to form a rest to glue to the grip if desired.
The rasp will be used to remove wood from the belly of the bow to get it to the desired draw weight or poundage. No wood should be removed from the back of the bow. The belly faces the shooter and the back is facing away from the shooter. The back will be more flat and the belly will be somewhat rounded. The resulting cross-section would be "D" shaped.
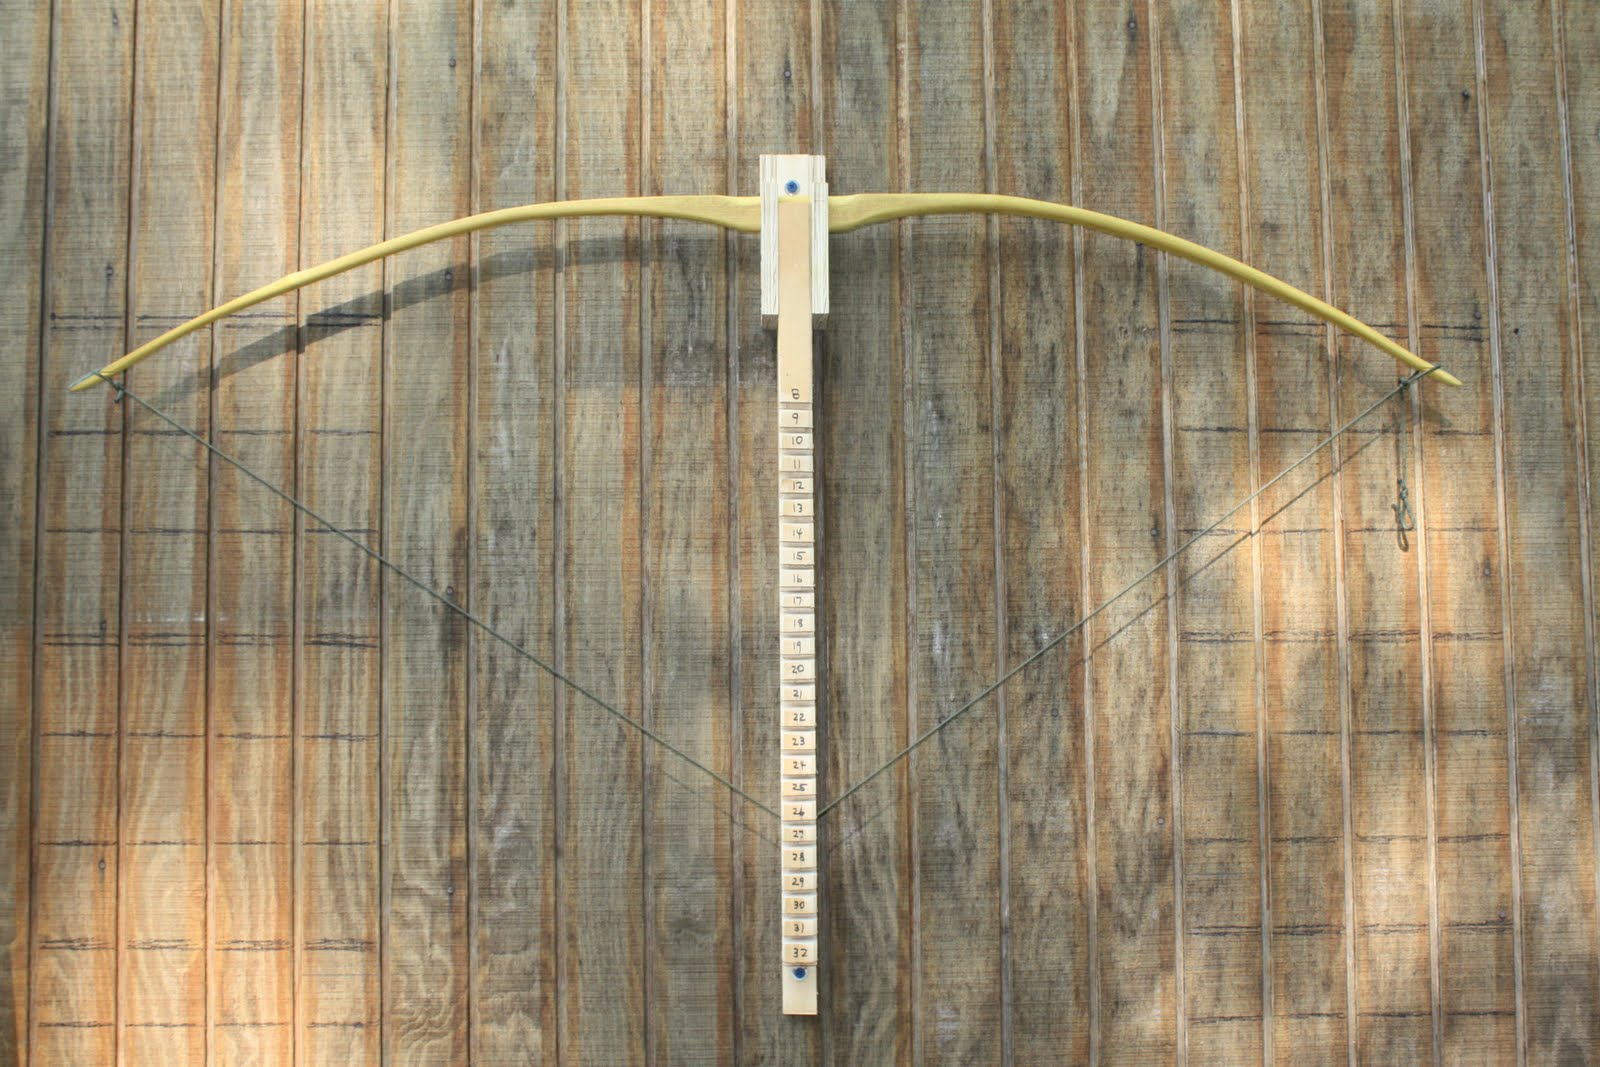
"Floor tillering" is next. Each tip of the bow is alternately placed on the floor and flexed while the handle is firmly gripped. Both limbs should flex evenly with no hinge or stiff points. As you approach the poundage desired, you will need to place the bow on a tillering stick and use a rope and pulley to flex the bow to observe that it is flexing symmetrically. Use the rasp to remove wood to make flexing uniform.
When the desired weight is reached, the bow may be sanded. The only exception would be if you desire to add reflex to the limbs. If so, a curved form will be used. The handle should be clamped to the form and the limbs heated, with a heat gun, a few inches at a time and clamped against the form with the back against the curve. After both limbs are fully clamped, allow the bow to cool overnight before removing from the form. If you have a form with 3" of reflex, you may end up with 1" to 11/2" after cooling and relaxing.
Final sanding, wrapping the grip with leather, filing the nock grooves and applying finish are the remaining steps. Nocks may be re-enforced with buffalo horn, antler material, or synthetics to make them stronger and decorative if desired. Tru Oil gunstock finish is a good finish for bows, but there are many good options.
The only thing left now is to practice, practice, practice to become a better archer. For the ultimate challenge, learn to make bamboo and wood arrows as pictured in the photo.
Photos are by L. Ross of a bow that he is currently making.


No comments:
Post a Comment